
Discovery Trolleys/Carts
Creating small everything
What do you do with those students who finish their art lesson early? There are many things students can make in a short time to keep them occupied until the end of the lesson. I imagine all teachers have different approaches to the “free time” challenge. In my personal experience, students love to have the complete freedom to create something small, no larger than a post card, that connect with the art lesson they just had, or to create something completely different. My preference for free time has always been drawing and giving students black pens or coloured pens.
While drawing is very important, it is also important to offer variety. Some teachers might like to give students tasks to do, but I prefer to give them the chance to use our discovery carts to see what they come up with.
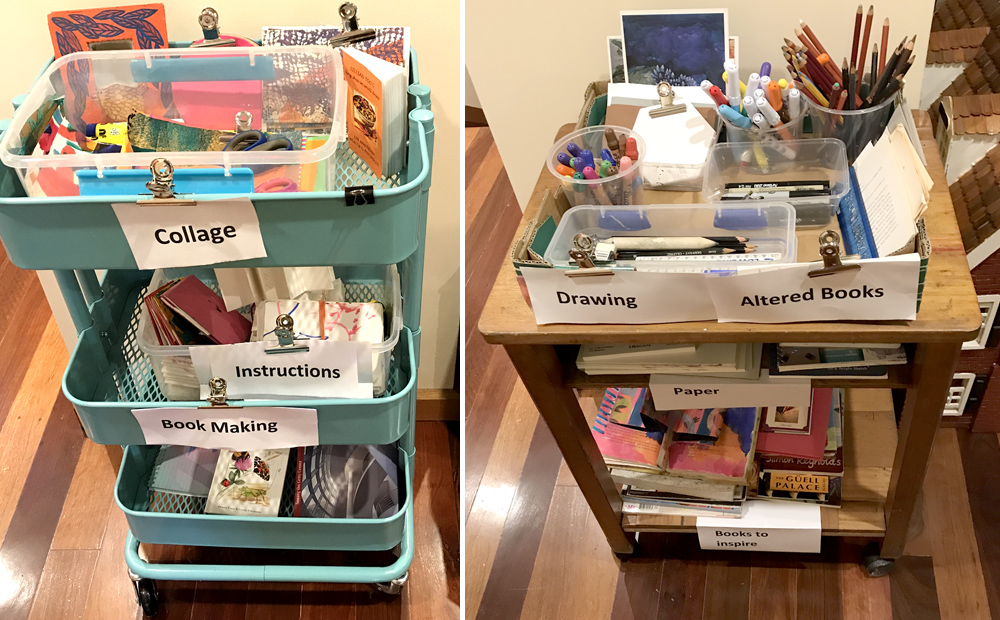
 In our room, we have two small carts/trolleys on wheels that are offered to the students to create something in the short time left before the end of the art lesson. These two small carts/trolleys are always kept away from the main areas and they are only “suggested” when a student or two come to me and say: “we have finished, what do we do next?”, and only after they demonstrate completion of their lesson project. I like to keep them out of view as this could cause students to rush their work.
Variety of content

 The content of the discovery carts varies from week to week as they are offered to students of different age groups. The age group I work with is 5 years old to 10 years old but the practice of using discovery carts can start even earlier. My four-year-old granddaughter uses a discovery cart at home and she understands the rules of keeping her cart in place and in order. At school or in class, it is important that students understand that maintenance of the carts is crucial. The carts have to be packed and taken away by the students using them by the end of the class.
Samples and comments
Altered books – Nooks Crannies and Corners

 Small altered books are very popular.
By cutting pages here and there, leaving 1” uncut, students can glue new pages of small drawings and collages, prints and other 2D works in their place. The example on the left shows the cut pages, a small print and a heart shape glued on pre painted backgrounds.
 Some pages have been sewn together with colourful yarns and a small folding book has been glued in the centre.
Collage – different recycled materials for making small collages
Collage material can be recycled bits like old maps, old discarded paintings and drawings, prints and all sort of magazine cut ups. Colourful bits of paper can be paint chips from the paint shop and small pieces of tinted/painted old books pages – these are a great, cheap and easy way to create additions for a collage.
I always keep discarded bits of paper from my art studio and cut up old prints for my students to use in the classroom.
 Mini collages made with paint chips – paint samples are colourful and free, paint shops throw away hundreds of paint chips and people at your local shop will be happy to keep them for you to collect. The other kind of collage material you find in paint shops are wall paper samples, that are great for collage and collographs.
 Small collages can be made with a limited number of coloured cards. To encourage students to make this kind of collage, I simply put two or three contrasting colours with a post card sized background card. In the example here the background card is black.
 Students can create simple collages using a variety of shapes, like geometrical shapes and organic shapes. They can also make small landscapes using limited colour cards.
It is a good idea to present some samples of cut paper compositions by combining background post card with samples of artist’s collages, like Matisse for example.
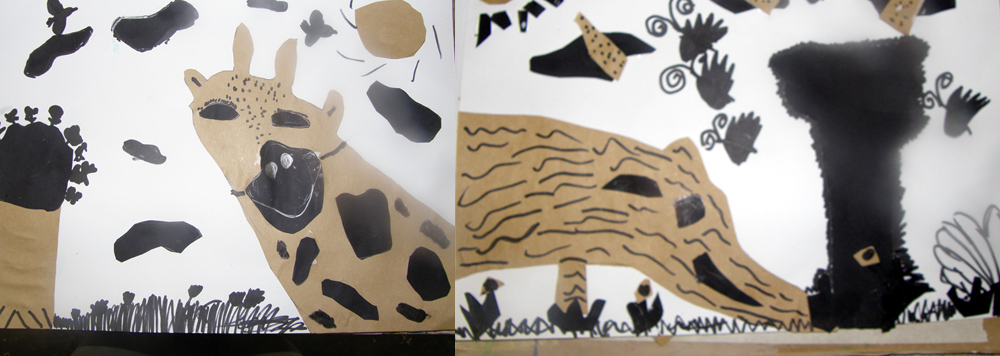
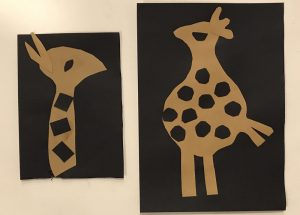 Younger students like to create images of animals.
The examples here show small black shapes glued on the tan background to create the illusion of cut up small shapes. Other students combined black and tan shapes on a white background and add details with black pens.
Textiles – small brooches – arpilleras – worry dolls – weavings – God’s eyes, the sky is the limit
There are many things students can make with small bits of textiles in combination with yarns, buttons, felt and more. Things like small brooches, worry dolls, bundles, garden sticks wrapped in yarn and small weavings are some of the textile works they produce.
Again, it is matter of keeping small pieces left over from other projects. Bits of lace, felt, yarn, raffia, fabrics are all put to good work by the student’s imagination.


Worry dolls and wrapped sticks small installations – For more information go to our Worry Dolls video lesson and our mini-lesson on our blog for more options and how to create them in smaller sizes. There is a video lesson on worry dolls on my website and a blog mini lesson on wrapped installation, which can be done in small sizes.
 Mini weavings are very popular, students can prepare their own cardboard looms and use big fat plastic needles made cut out of plastic milk bottles, the longer the needle the easier it is for very young children.
Last but not least – DRAWING

There are many ways and many tools to do drawings. Keeping the format of a post card size students have produced the most interesting and amazing drawings in their free time. I have collected small drawings from doodles, to cartoons, to the most accurate observations.
 Students are given complete freedom to draw from their imagination, memory or observation. It is up to them. It doesn’t matter if drawing is a repetition of lines or shapes or textures, “mark making” is drawing too.
“Art Cards” can be included in the cart to provide inspiration and ideas for the students.
Young children don’t have any problem producing many drawings in a short period of time as drawing is an important language in the early years. The contents of the cart for drawing should be varied and according with the age group, with tools like washable felt pens, fat crayons and pencils for the very young.

Boys love to have the freedom to draw superheroes or favourite football players. Older boys prefer Manga drawing and Zentangles drawn with black or coloured pens. These drawings have been made with pencils on discarded pieces of Xerox/Photocopy paper.
 An example of Zentangle drawing, drawn on shapes I bought at a craft shop. These paper shapes are normally used for quilters and they come in different shapes and sizes, perfect to keep older boys and girls busy.
 An old favourite, a picture of me, Raquel, with my signature lipstick and gorgeous hairy legs!!!!
 Small pieces of B&W magazines are a good idea to add to the drawing basket for students to use as a reference, to practice tone for example. The sample is a drawing from a bit cut up from a science magazine by an older student.
Drawing with Pencils
Drawing from Nature – pen and ink drawing
A favourite:

Drawing exercises are also popular; these are designed for drawing repetitions and exploring relationships between elements such as lines and shapes. The idea comes from the book “Drawing with Children” by Mona Brookes. There are many different useful drawing exercises in this book that can be extended and modified according to the age group of students.

Teacher “invented” drawing exercises that deal with shapes, overlapping and distance
The line/shape relationships are drawn with black felt pens and I have found it helps students to develop observation drawing and build confidence as drawings with black pens cannot be erased.
Students love to engage in this kind of drawing. Boys are especially fond of these free time activities. I have added many extra exercises of my own creation to avoid too much repetition.
NOTES: I am in the process of producing short videos on simple book making techniques and Altered books, two very popular activities. They are not included in this blog as it is already quite long. I hope I’ll be able to add these two short videos later on.
- Cart or trolleys don’t have to be new equipment, there is plenty of odd carts with wheels at second hand furniture shops like the picture at the top right.
- The labels on the carts are attached with clips as they will be changing every two weeks.
 This post is a part of The Art Ed Blogger’s Network: Monthly Tips and Inspiration from Art Teacher Blogs. On the first Tuesday each month, each of these art teacher blogs will post their best ideas on the same topic.
Participating Art Teacher Blogs:
- Art Class Curator
- Art Ed Guru
- Art is Basic
- Art Room Blog
- Art Teacher Tales
- Art with Mr. E
- Arte a Scuola
- Artful Artsy Amy
- Brava Art Press
- Capitol of Creativity
- Create Art with ME
- MiniMatisse
- Mona Lisa Lives Here
- Mr. Calvert’s Art Room Happenings
- Mrs. Boudreaux’s Amazing Art Room
- Mrs. T’s Art Room
- Ms. Nasser’s Art Studio
- Party in the Art Room
- shine brite zamorano
- Tales from the Traveling Art Teacher
- There’s a Dragon in my Art Room